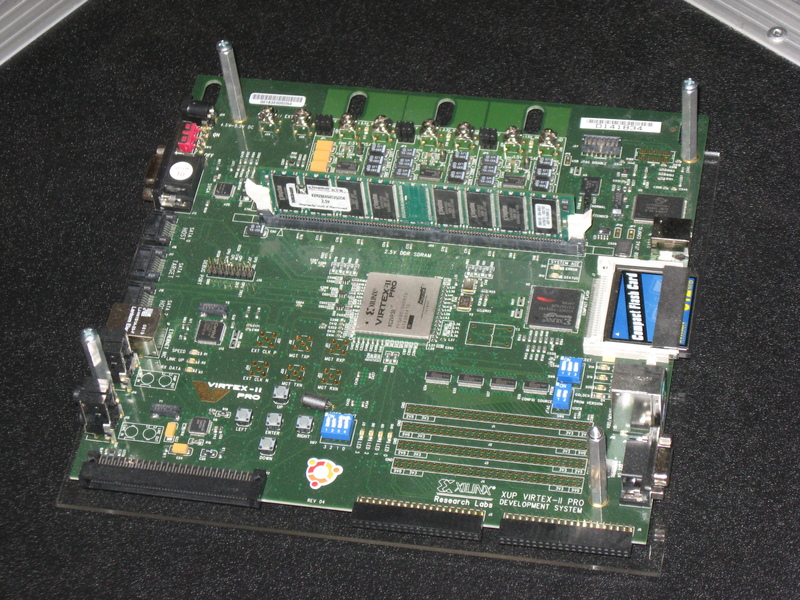
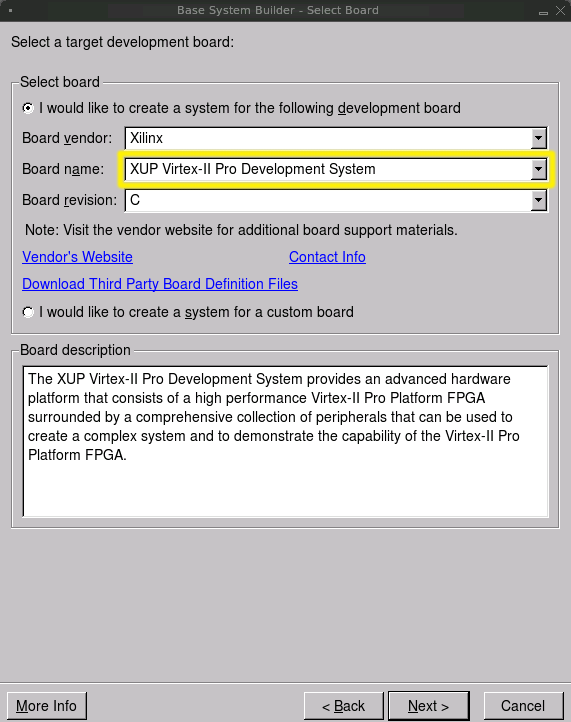
Required: XUP Virtex-II PRO evaluation board, sold by Digilent Inc.
Required: KVR266X64C25/256 256MB DDR RAM module, sold by Digilent Inc. (and other vendors). NOTE: You have to press down very firmly to insert the memory card; Make sure its key hole is lined up and then press down hard until the side clips snap into the DIMM.
WARNING: Digilent also sells a 512MB module. This will not work. You must have the specific 256MB module for this tutorial.
Optional: Compact Flash card
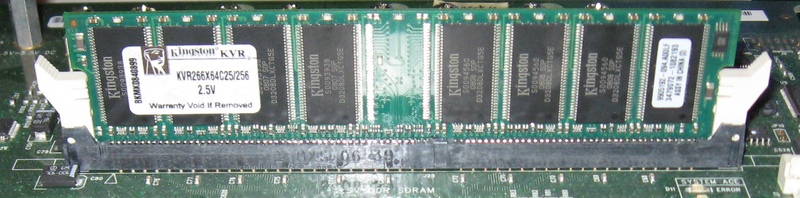
Good, properly inserted DIMM (the DIMM is pressed down and the clips are snapped into the sides):
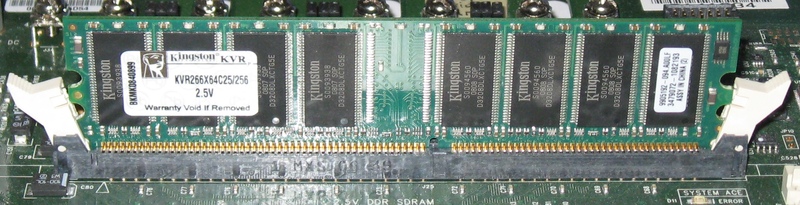
Bad, improperly inserted DIMM (the DIMM needs to be pressed down further until the clips can snap into the sides):
This figure shows the XUP board with the 256MB DIMM and Compact Flash card installed:
EDK 10.1 SP3 must be installed. (SP2 is insufficient because it does not contain specs for the DDR RAM module)
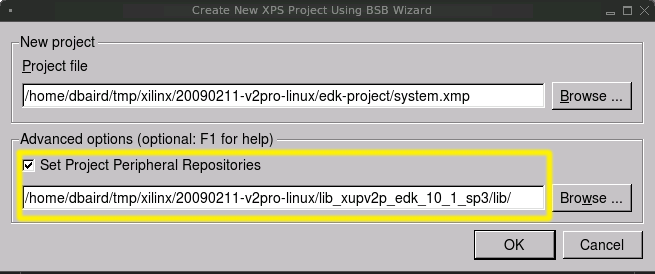
Download lib_xupv2p_edk_10_1_sp3.zip. This file is used by the EDK Base System Builder for the XUP board. This file can be downloaded from:
http://www.xilinx.com/univ/xupv2p.html
http://www.xilinx.com/univ/XUPV2P/lib/lib_xupv2p_edk_10_1_sp3.zip
Unzip it using the following command:
unzip lib_xupv2p_edk_10_1_sp3.zip -d lib_xupv2p_edk_10_1_sp3
Download the device tree generator:
mkdir edk-project
git clone git://git.xilinx.com/device-tree.git
mv device-tree/bsp edk-project
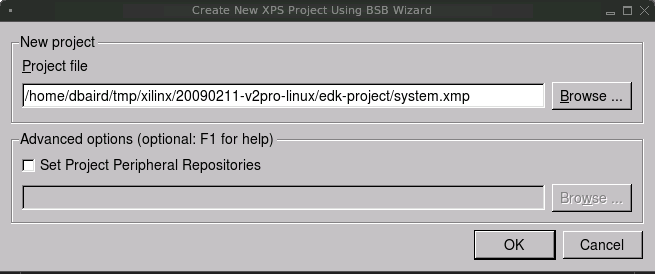
It will be assumed that your directory layout for the project will be like this:
edk-project/
edk-project/system.xmp     - The EDK project file
edk-project/bsp            - The device tree generator
edk-project/...            - (other EDK project files)
edk-project/implementation/download.bit
                           - The location of the compiled bitstream
edk-project/ppc405_0/libsrc/device-tree/xilinx.dts
                           - The location of the generated device tree
lib_xupv2p_edk_10_1_sp3/   - Contents of lib_xupv2p_edk_10_1_sp3.zip
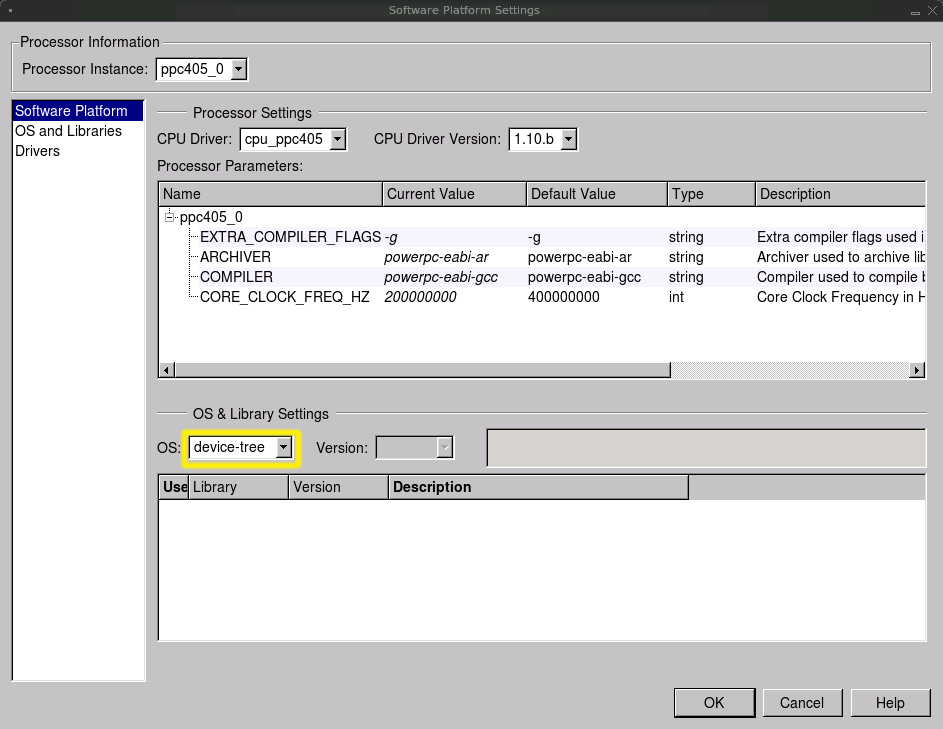
Click "OK" to finish with Software Platform Settings
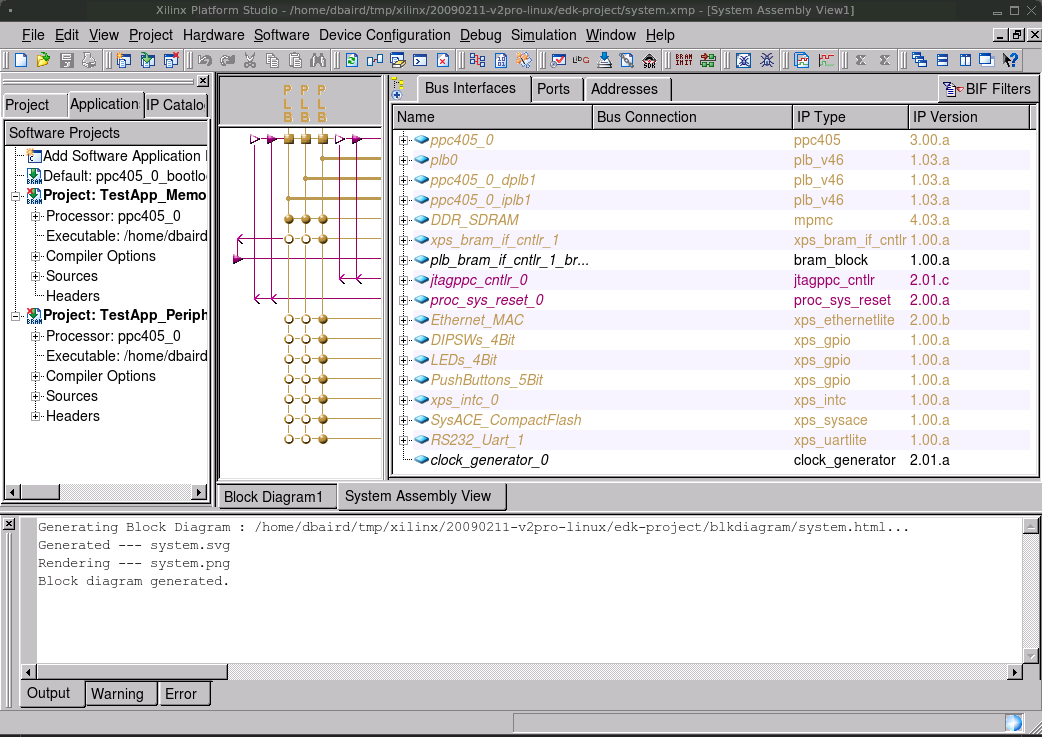
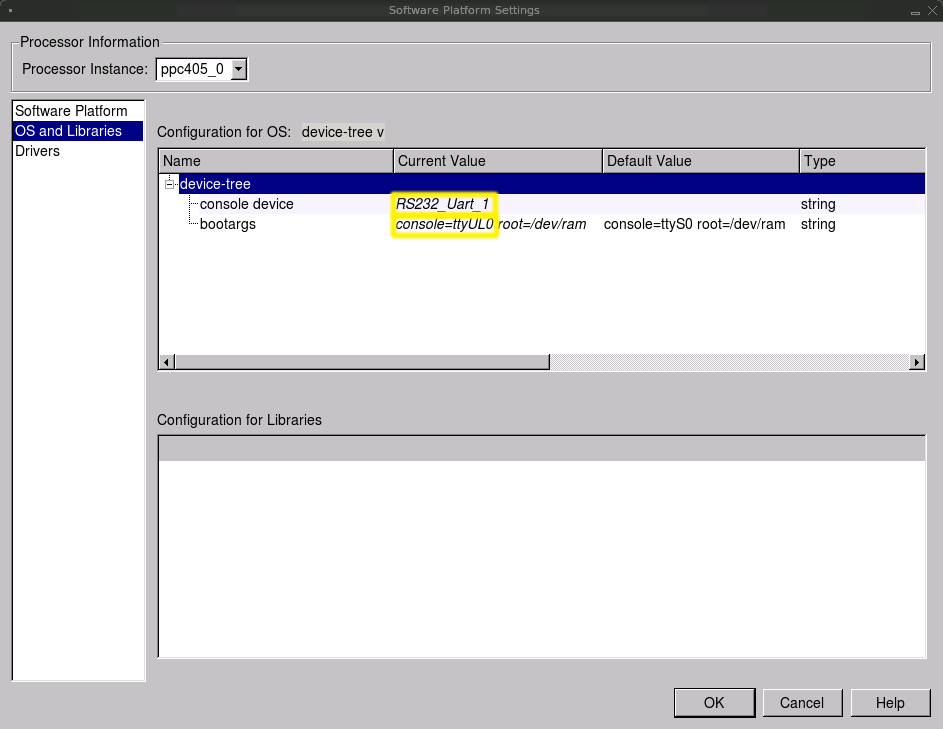
Generate the device tree by clicking the menu: "Software: Generate Libraries and BSPs". The following file will be created inside your EDK project directory:
./ppc405_0/libsrc/device-tree/xilinx.dts
This file (xilinx.dts) will be used to help build Linux (which is described in the next tutorial).
This file is a plain text file and you are encouraged to open in it and have a look. It's contents look something like this excerpt:
/dts-v1/;
/ {
#address-cells = <1>;
#size-cells = <1>;
compatible = "xlnx,virtex405", "xlnx,virtex";
model = "testing";
DDR_SDRAM: memory@0 {
device_type = "memory";
reg = < 0x0 0x10000000 >;
} ;
chosen {
bootargs = "console=ttyUL0 root=/dev/ram";
linux,stdout-path = "/plb@0/serial@84000000";
} ;
cpus {
#address-cells = <1>;
#cpus = <0x1>;
#size-cells = <0>;
ppc405_0: cpu@0 {
clock-frequency = <200000000>;
<*snip*>
} ;
} ;
plb0: plb@0 {
#address-cells = <1>;
#size-cells = <1>;
compatible = "xlnx,plb-v46-1.03.a", "simple-bus";
ranges ;
<*snip*>
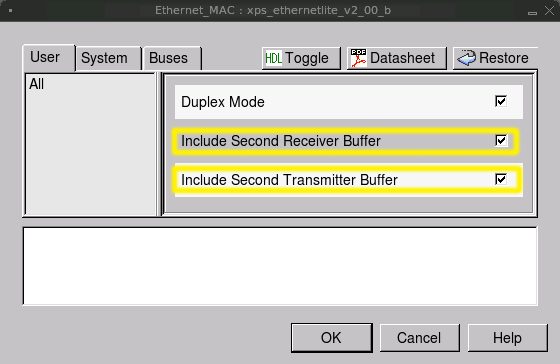
Ethernet_MAC: ethernet@81000000 {
compatible = "xlnx,xps-ethernetlite-2.00.b";
device_type = "network";
interrupt-parent = <&xps_intc_0>;
interrupts = < 1 0 >;
local-mac-address = [ 02 00 00 00 00 00 ];
reg = < 0x81000000 0x10000 >;
xlnx,duplex = <0x1>;
xlnx,family = "virtex2p";
xlnx,rx-ping-pong = <0x1>;
xlnx,tx-ping-pong = <0x1>;
} ;
RS232_Uart_1: serial@84000000 {
clock-frequency = <100000000>;
compatible = "xlnx,xps-uartlite-1.00.a";
current-speed = <115200>;
device_type = "serial";
interrupt-parent = <&xps_intc_0>;
interrupts = < 2 0 >;
port-number = <0>;
reg = < 0x84000000 0x10000 >;
xlnx,baudrate = <0x1c200>;
xlnx,data-bits = <0x8>;
xlnx,family = "virtex2p";
xlnx,odd-parity = <0x0>;
xlnx,use-parity = <0x0>;
} ;
<*snip*>
} ;
} ;
Files for download:
20090211-v2pro-linux-edk.tar.gz (md5sum: bbc3ee171670f77cffa8ecbc3f79cd4d)
This is a reference design which has all the steps from previous sections applied and is ready to use with EDK 10.1 SP3. This tar file also contains "download.bit" and "xilinx.dts" so that you don't have to compile anything.