Contents
Download and untar buildroot:
wget http://buildroot.uclibc.org/downloads/buildroot-2009.02.tar.bz2
tar xjvf buildroot-2009.02.tar.bz2
cd buildroot-2009.02/
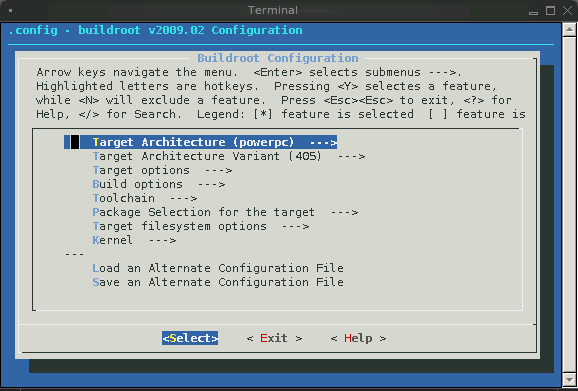
Configure buildroot. Refer to the Section below, Configuring the Root Filesystem, for specfic configuration options:
make menuconfig
Alternatively, if you have an old configuration file that you wish to reuse, do this:
cp buildroot-crosstool-ng-simple-config .config
make oldconfig
Tell buildroot to build all the packages you selected, and create a root filesystem image:
unset  CC CXX CPP CFLAGS INCLUDES CXXFLAGS LD_LIBRARY_PATH LIBRARY_PATH CPATH
export CC CXX CPP CFLAGS INCLUDES CXXFLAGS LD_LIBRARY_PATH LIBRARY_PATH CPATH
make
When buildroot is done building, it will have produced the following image of the root filesystem:
binaries/uclibc/rootfs.powerpc.tar.gz
If you do not see this file, then that most likely means one of two things:
The root filesystem image needs a small patch to enable logins on the uartlite port. To apply this patch, we need to extract image, apply the patch, then regenerate the tar archive:
mkdir rootfs-tmp
fakeroot

tar xzvf binaries/uclibc/rootfs.powerpc.tar.gz -C rootfs-tmp

cd rootfs-tmp
patch etc/inittab << EOF
Index: etc/inittab
===================================================================
--- etc.orig/inittab
+++ etc/inittab
@@ -29,6 +29,7 @@

 # Put a getty on the serial port
 #ttyS0::respawn:/sbin/getty -L ttyS0 115200 vt100
+ttyUL0::respawn:/sbin/getty -L ttyUL0 115200 vt100

 # Logging junk
 null::sysinit:/bin/touch /var/log/messages
EOF
tar czvf ../rootfs.powerpc.patched.tar.gz .
genext2fs -d . -b 4096 ../initrd.patched.ext2

exit # leave the fakeroot shell
cat initrd.patched.ext2 | gzip > initrd.patched.ext2.gz
Now, there is a root filesystem image: initrd.patched.ext2.gz. This is the one that you should use as an initrd for the Linux kernel (you'll eventually rename it to ramdisk.image.gz):
cp initrd.patched.ext2.gz <linux>/arch/powerpc/boot/ramdisk.image.gz
It is fairly easy to generate an initramfs, but you have to take care to create a "/init" file (because initramfs does not recognize "/sbin/init"). You can probably achieve this by creating a symlink from "/init" to "/bin/busybox".
If you select certain packages in buildroot, you may come across this message: "cannot find /lib/libc.so.0". This happened to me when I selected the packages from MTD utils.
To workaround this problem, I manually edited my uClibc toolchain installation (based on crosstool-ng) as follows:
Edit /home/xilinx/crosstool-ng-1.3.2/powerpc-405-linux-uclibc/powerpc-405-linux-uclibc/sys-root/usr/lib/libc.so by replacing absolute paths with relative paths (see Help with Patch Files for more information):
Index: lib/libc.so
===================================================================
--- lib.orig/libc.so
+++ lib/libc.so
@@ -2,4 +2,4 @@
  * Use the shared library, but some functions are only in
  * the static library, so try that secondarily. */
 OUTPUT_FORMAT ( elf32-powerpc )
-GROUP ( /lib/libc.so.0 /usr/lib/uclibc_nonshared.a AS_NEEDED ( /lib/ld-uClibc.so.0 ) )
+GROUP ( ../lib/libc.so.0 ../usr/lib/uclibc_nonshared.a AS_NEEDED ( ../lib/ld-uClibc.so.0 ) )